Sunday, August 3, 2014

Breakfast Casseroles Bites

My baby starts Kindergarten tomorrow. He is so flipping excited. Me, not so much. It isn't because I don't want him to go to school. Trust me, this last week has gone by so slow. He and I definitely need a regularly scheduled break from each other after two months of almost solid one-on-one time. I hope this doesn't make me a bad parent, nor do I want it to come off that I don't love him. Momma just needs some quiet time. But I digress...back to why I am not excited about school starting back up. I am not a morning person. It takes me a while to get going in the morning. I'm the person who will set four different alarms on my phone, only to snooze all of them and wake up with 15 minutes to get ready to go. Not being a morning person makes getting a kid up, dressed, fed, and to school somewhat difficult. Peanut's breakfasts last year for PreK consisted of either frozen waffles, cinnamon toast (or toast with jam), cereal, or an apple sauce pouch with a granola bar. I didn't win any parent of the year awards with that carb heavy breakfast menu. This year I'm going to try to be a little better on the breakfast end. I'm sure we will still be rushing around like a chicken with its head cut off, but Peanut will not be eating frozen waffles five days in a row. He and I brainstormed a list of five different breakfasts and before bedtime, he will choose which one he wants the following morning. No breakfast will be repeated until he has had all five choices. One of the breakfast ideas he came up with was Breakfast Casserole Bites (he calls them egg cups). We were introduced to these babies about two years ago when a friend brought a big frozen batch of them on vacation. They are pretty easy to assemble ahead of time and freeze beautifully. Pop them in the microwave and voila! Yummy breakfast goodness. If you make these, I really recommend buying silicone muffin liners. They cut down on cleanup and help keep the "bites" separated when freezing. Just don't forget to take them off before microwaving!!!

Breakfast Casserole Bites

Makes 12 (I always double the recipe)
Preheat oven to 350 degrees

Ingredients-

  • two pieces of sandwich bread (I usually fish out the butt pieces of the loaf to use for this)
  • 8 eggs
  • 1/2 cup milk
  • 4 oz grated sharp cheddar cheese
  • 1/2 lb cooked, drained, and crumbled bacon or sausage
Step 1- Place liners in muffin pan. I'm sure you could grease the cups and forgo the liners, but I've never made them this way.

Step 2- Cut up bread into 1/2" pieces and distribute evenly throughout the muffin pan.
Obviously, I doubled the recipe.


Step 3- Sprinkle an even amount of meat into each cup.
Mmmmm...sausage.

Step 4- Whisk together the eggs and milk.


 Step 5- Evenly distribute the egg mixture into the cups.

Step 6- Add an even-ish amount of cheese to each cup.

Step 7- Bake 15-20 minutes in a 350 degree oven until eggs are set and cheese is bubbling.

Step 8- If freezing, let cool, remove from pan, and store in a freezer safe container. Separate layers with wax paper. 


Once frozen, pop one into the microwave (remove liner and put on a microwave safe plate) for one and a half minutes. Then.....enjoy!!! Each "bite" is roughly 175 calories, depending on  the quality of your ingredients.


Thursday, June 26, 2014

Hopping John

My mouth is watering just thinking about this blog post. I'm not sure the entire history of Hopping John, or what it is traditionally in the dish, but I'm sure you can Google it. I do know it is usually a southern dish made of black eyed peas. I would equate it to a black eyed pea stew. I usually serve it for our New Year's Day dinner (you know...the whole black eyed peas on New Year's bringing you good luck and all...). But then, I also have started throwing it into a monthly dinner rotation because it is that good. Bonus points, Peanut loves it and requests it often. He thinks it gives him extra jumping powers. Honestly, the only special powers it does give him comes from the gaseous emissions from his rear end!


Hopping John Recipe***

***I found this recipe on Pinterest, but once we made it and loved it, I wrote it down in my recipe book and deleted the pin. Since then, I can't find where I got the original recipe. If you happen upon it, let me know and I'll give that person credit for this delicious meal!

Ingredients:

  • 1 lb package of black eyed peas, soaked overnight
  • 3 large sausages (casings removed)
  • 4 slices of cooked bacon (chopped into smallish pieces)
  • 1/2 cup red onion (chopped)
  • 2 tsp. minced garlic
  • 1/2 cup diced celery
  • 1/2 cup diced carrots
  • 1/2 cup diced bell pepper
  • 4-6 cubes bouillon (I usually use 6 beef cubes)
  • 6 cups hot water
  • 3/4 tsp. cumin
  • salt to taste (after cooked)

Directions:


1) Plug in and turn on a standard sized crock pot (4-6qts??) and turn on (low for 7 hours or high for 4 hours). Add the water and bouillon cubes. Let the cubes dissolve while you are prepping all the other ingredients.

2) Drain your black eyed peas and put them into the crock pot.


2) Chop and saute the onion, garlic, bell pepper, carrots, and celery for 5 minutes or until tender. Add sauteed veggies to the crock pot.
Love all the colors. PS- this smells WONDERFUL!

3) Using the same pan that you cooked your veggies in, cook and crumble the sausage. Drain and add to the crock pot. 

4) If your bacon hasn't been precooked, cook it, set onto paper towels to drain, chop up, and throw into the crock pot. (I don't have a picture of this because I had cooked the bacon the night before).

5) Add the cumin to the crock pot. Stir everybody up, put lid on, and cook on low for 7 hours or high for 4 hours. Serve over rice and with cornbread.
Into the pot everyone goes....

OM NOM NOM!

Try to keep your family from eating this all in one sitting, because as good as it is the day of, it's even better as left overs!!!

Enjoy!


Tuesday, May 27, 2014

Strawberry Balsamic Jam

It's the tail end of strawberry season here in GA. Our little family spent last Saturday morning picking two and a half gallons at an orchard about an hour from us in Blue Ridge. It cost the three of us $48 to do so, which seems like a lot at first. When you factor in that you get a tractor tour of the orchard, two and a half gallons of perfect strawberries (because why would you pick bad ones?), and all the strawberries you can eat while picking...it's actually a pretty good deal. The Woodman and I figured that the same amount of strawberries purchased from the grocery store would cost $60-100; and you would have to throw a good portion of them out due to spoilage. By the time I was able to clean and hull all the strawberries (24 hours after picking), I only had to throw out two berries from the entire bunch!  Plus, have you even eaten a strawberry freshly picked and warmed by the sun? If not, you are missing out on one of life's greatest pleasures. Five year old Peanut ate more than he picked and went around the whole time telling the Woodman and I how fresh the berries tasted. :)
Waiting for the tractor ride. Do you like my hat?

Om nom nom!!!!
 We have picked our own strawberries every year for the last several years now. About half of our haul is always earmarked to make strawberry jam. I play around with the rest...last year I made strawberry lemonade concentrate (yum!!!). This year I'm going to: make strawberry lemonade muffins, freeze pureed strawberries for homemade strawberry ice cream, and freeze solid berries for the Woodman to make smoothies. For the purpose of this blog post, I'm going to focus on the jam. The recipe for the jam comes from the Ball Complete Book of Home Preserving. It is literally the very first recipe in the book, so it must be good!

The day that I wash and hull the strawberries, I take a square baking dish and place the strawberries in it in a single layer. I then use a potato masher and crush them up. I transfer the crushed berries into a ziploc baggie, stopping once I've gotten five cups of crushed berries. I then put the baggie into the refrigerator until the day I make my jam. This also freezes beautifully if you want to make the jam later on in the year. Some basic canning knowledge and equipment is required to make this recipe. If you don't know how to can, it's pretty easy once you get the hang of it. I taught myself how to can things by researching it on the internet.

Strawberry Balsamic Jam

Ingredients-

***Makes about eight 8-ounce jars****

  • 7 cups of granulated sugar
  • 5 cups crushed strawberries
  • 1 Tbsp. lemon juice
  • 3 Tbsp. good quality balsamic vinegar
  • 1 package (1.75 oz/49 to 57g) regular powdered fruit pectin
  • 8 (8oz) Ball mason jars, lids, and screw bands
Step 1- Clean your jars, lids, and screw bands. Sterilize jars in hot water canner and heat the lids while preparing the jam.

Step 2- Measure the sugar ahead of time and set aside. Sugar needs to be added all at once.
That's a lot of sugar!


Step 3- Add crushed strawberries to a large, deep stainless steel sauce pan.

Step 4- Add lemon juice, balsamic vinegar, and fruit pectin. Whisk until pectin is dissolved. Bring to a full rolling boil over high heat, stirring frequently. (Optional- Add up to 1/2 tsp of butter during cooking to help cut back on the foam produced during the cooking of fruit. This will make step 6 a lot easier)

Step 5- Add sugar all at once and stir continuously until the mixture returns to a full rolling boil that cannot be stirred down. Then, boil hard while continuing to stir constantly for a full minute.

Step 6- Remove from heat. Use a slotted metal spoon to skim of foam produced during the cooking of the fruit.
Before skimming off the foam
After skimming off the foam

Step 7- Remove a clean, sterile, hot jar from the water canner. Do not dry jar. Using a canning funnel and a ladle, add hot jam to the jar, leaving a 1/4 in headspace. Wipe rim and threads of jar with a damp cloth or towel to remove any food residue, put on a hot lid, and screw on a band until fingertip tight. Do not over tighten!

Step 8- Return jar to canner, and repeat with the rest of the jars. 

Step 9- Put the lid on the canner and wait until the water gets to a full rolling boil over high heat. Once it begins boiling hard, start your processing time. Here in GA the processing time is 10 minutes. The altitude where you live changes the processing time, so do a little research on the internet to check your altitude and see how it affects processing time. Once the jars finish processing, remove the canner from heat, remove the lid, and let the jars sit in the canner for 5 minutes. Remove the jars from the canner, sit them upright on a towel in a draft-free place, cover them up with another towel, and let cool, undisturbed, for 24 hours. 

Step 10- After 24 hours, remove screw bands and check lids to make sure they all properly sealed. If they didn't seal, they must be refrigerated at this point or reprocessed (after adding a new, hot lid). Rinse and dry screw bands. Loosely reapply lids, if desired, label your jars, and store in a cool, dry, dark place. Try not to eat a whole jar in one sitting!!!


Happy jamming! :)

Tuesday, April 22, 2014

Resurrection Rolls

I didn't grow up with a very formal religious background. As we grew up, we would go to church on Easter and Christmas. I stumbled my way to salvation on a Disciple Now weekend when I was in high school. Even after that, I still didn't attend church on a regular basis. I would go through times where I would go regularly and then would move just far enough away so that it wasn't convenient to continue to attend the church we liked. While not going to church, I do worship in my own way. I talk to God regularly and marvel at His work in my life. I feel like being out in nature is a great way to celebrate God's work.

As Peanut has gotten older, I felt like I wanted him to have more knowledge of God than I had at his age. We started back in December, when we followed a Bible reading advent leading up to Christmas. I loved his enthusiasm for learning about the birth of Jesus! Peanut received a kid's devotional book at Christmas that we try to read each night. 

While some of the devotions are a bit over his head, we still get to talk daily about God and read from Peanut's Bible. And as a bonus for the Woodman and I, the daily passages seem to be just perfect for situations we have going on in our lives as well. 

As Easter approached, I began looking through Pinterest to see what ideas they had for teaching children about the Resurrection. I wanted Peanut to know the real reason for Easter, not that it was about the Easter Bunny and candy. I came across many different posts for Resurrection cookies and rolls. I decided to do the rolls because it'd also solve my problem of what to eat for breakfast Easter morning! Starting on Good Friday, I laid the groundwork for Easter by reading about the crucifixion from Matthew 27:11-55. Peanut and I talked about how Jesus said he would tear down the Church of God and rebuild it in three days. We then counted and Peanut discovered that the third day was Easter Sunday. Easter morning, Peanut and I read from Matthew 27:57-66, which described how Jesus' body was prepared for burial. We then made our Resurrection Rolls.

Resurrection Rolls

Ingredients- a can of crescent rolls, 8 large marshmallows, 2 Tbsp melted butter, and 1/4 cup cinnamon sugar (make your own by mixing 1/4 cup sugar with 1 tsp. cinnamon), and a Bible 

Preheat oven to 350 degrees. Cover a shallow cookie sheet with parchment paper or aluminum foil for easy clean up. 


Unroll the crescent rolls. Take one and flatten out the wider end a little more. 
*The crescent roll represents the cloth used to wrap Jesus' body.*

Give your child a large marshmallow. 
*The marshmallow symbolizes Jesus' body. Peanut and I talked about how it was white and that white is used to show His purity.*


Roll the marshmallow around in the melted butter.
*This represents the embalming oils.*


Roll the marshmallow in the cinnamon sugar.
*This represents the spices used to anoint Jesus' body.*


Tightly wrap the marshmallow up in the crescent roll and seal up the sides.
*This represents the wrapping of the body.*

He was super excited to seal the tomb. Hence the action shot.
Repeat with the rest of the crescent rolls and marshmallows. Put onto cookie sheet and put into oven for 10-12 minutes. Warning- marshmallows will probably ooze out the sides, hence the need for parchment paper or aluminum foil. 
*The oven represents the tomb and the cooking time represents the three days.*

While the rolls were cooking, Peanut and I read Matthew 28:1-10, which tells of finding the tomb empty on the third day.


After the rolls finished cooking, allow the rolls to cool slightly. When the rolls were cooking, the marshmallow melts. When your child breaks open their crescent roll, they will find an empty spot where the marshmallow was.


Peanut was amazed to find his roll empty! His reaction- "Where did Jesus' body go?!?!" He has Risen!!


Thursday, March 13, 2014

Homemade Spinach Pasta

I have recently discovered the deliciousness that is the homemade pasta noodle. I found a basic noodle recipe and have made it several times now. It's been kid approved. It consists of....wait for it.... TWO ingredients. Flour and eggs. Do you have those two items in your kitchen? Then yummy homemade pasta is just a few steps away. While this blog post is actually about spinach pasta, all you need for basic pasta is two cups of flour (most recipes I've seen call for special flours, but I just used all purpose) and one egg. This will make enough pasta for about 2-3 people. Then, follow the steps below, omitting the spinach steps.

I set out to make regular pasta last night and at the last second remembered that I had some spinach in the fridge that needed to be used sooner rather than later. After a quick check through Pinterest, I found a recipe that closely matched the one I normally used, meshed the new recipe with the one that worked for me in the past, and began preparing the dough. I was worried when I got to the kneading portion because the dough was so tough and hard to knead. I ended up having to use my rolling pin to give my kneading a little extra OOMPH. I continued on with my endeavor, but was prepared to just chalk this up to a loss and run out for fast food if it didn't turn out well. My perseverance paid off though and it turned out wonderfully! Now, without further ado.... the step by step instructions!

Spinach Pasta

Ingredients- olive oil, garlic (optional), 1/2 lb. spinach, 4 cups flour, 2-3 eggs

Step 1- Over medium heat, add a couple turns of olive oil and garlic, if you like, to a skillet.

Step 2- Add spinach, cover with a lid, and cook for about 5 minutes. Stir occasionally.

Step 3- Remove spinach from heat. Once spinach is cool enough to handle, squeeze all the liquid out of the leaves. Once I squeezed out the liquid by hand, I then put the spinach into several paper towels and squeezed it some more. Get all that liquid out!
A dry lump of spinach!
Step 4- Finely chop the spinach.
Optional step- if you have a mortar and pestle, put spinach in after chopping and ground into a paste. I only did this step because I actually have a mortar and pestle that I haven't used in several years.

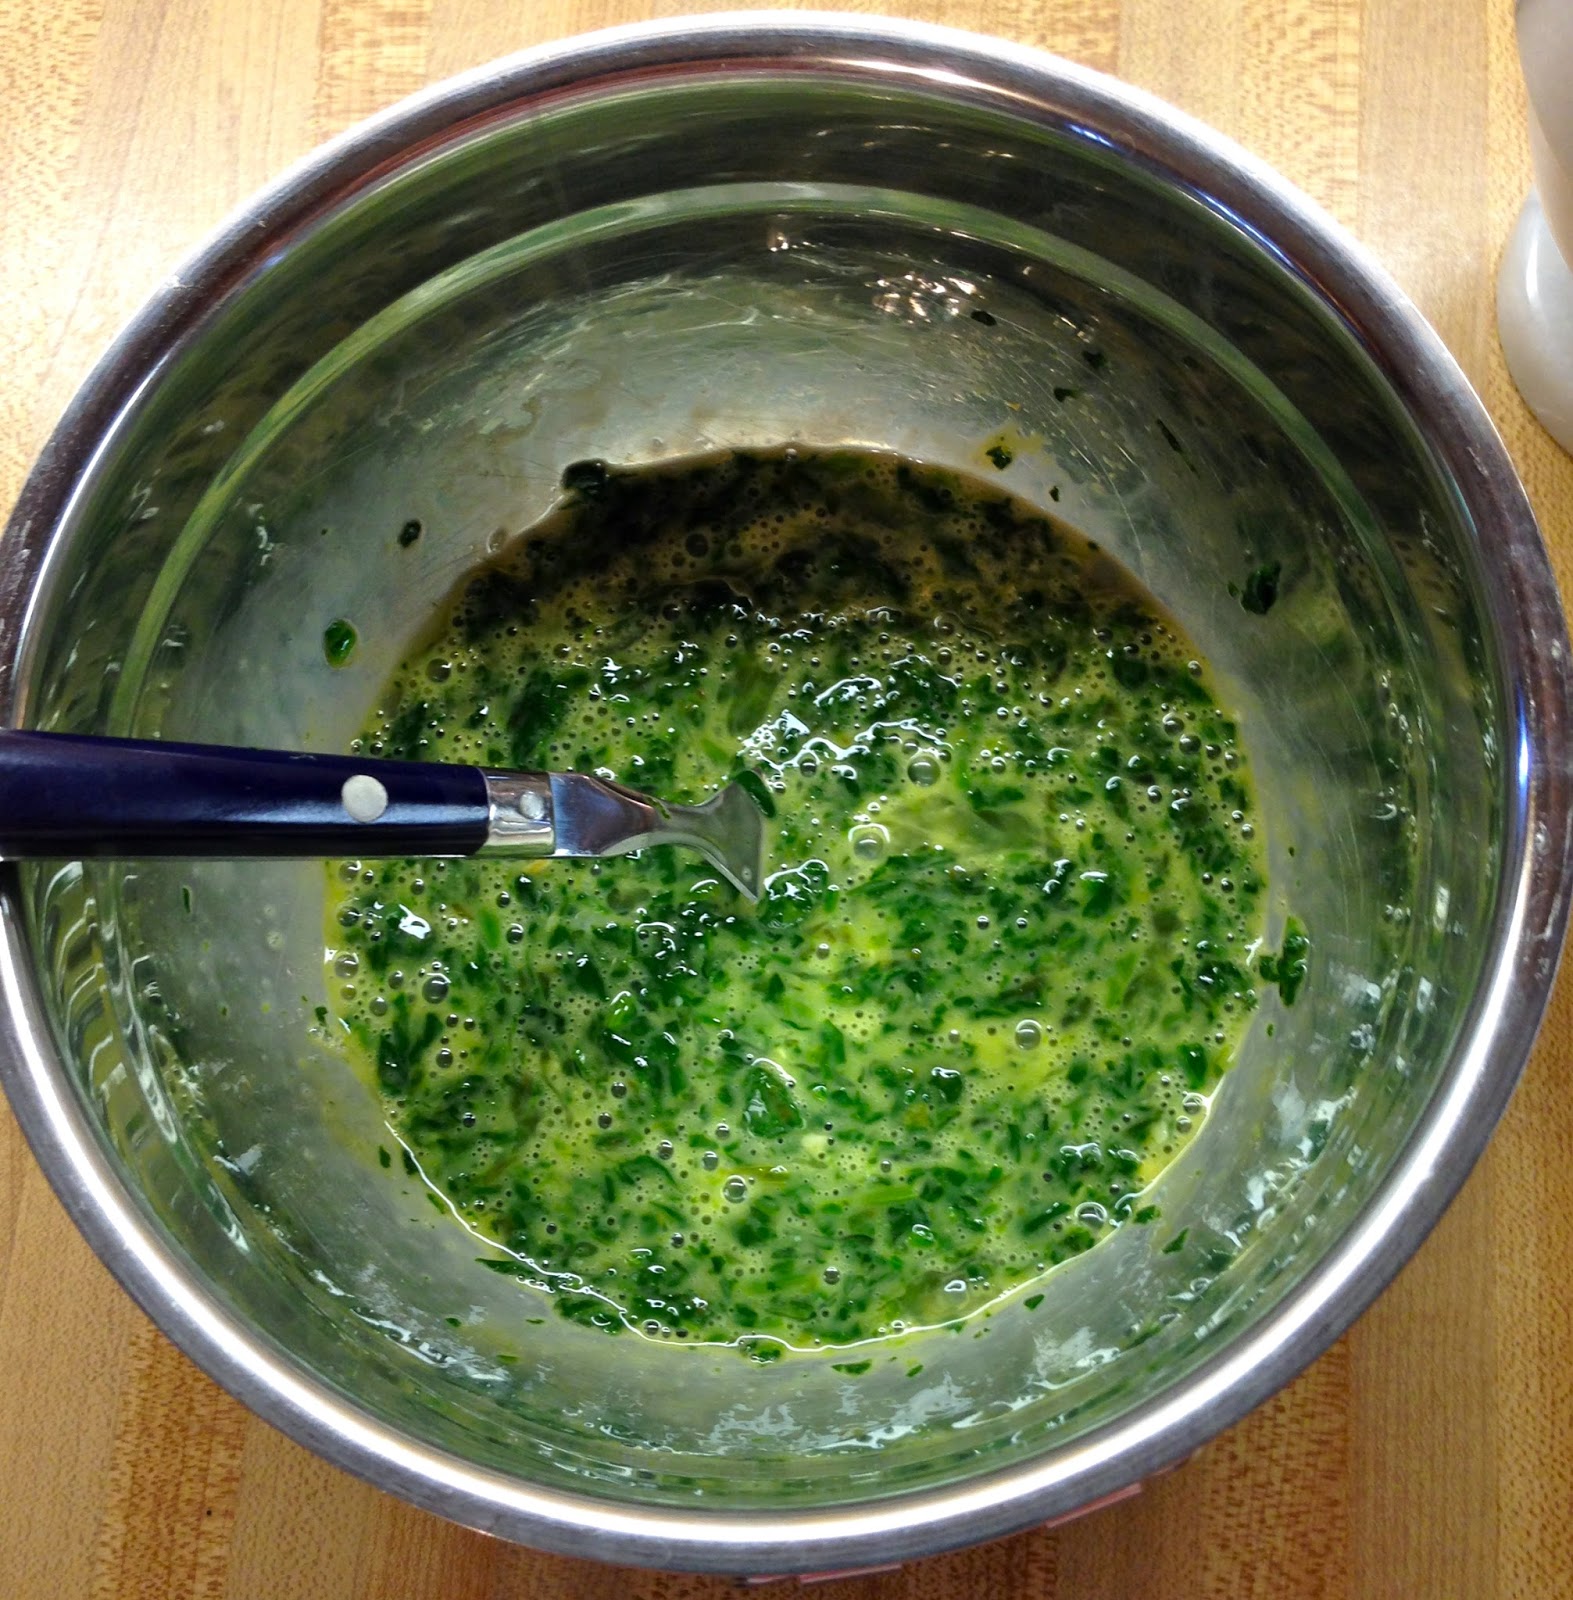
 Step 5- In a small bowl, crack two eggs and add spinach, mixing well.


Step 6- Measure out 4 cups of flour and put onto a clean surface, creating a well for the spinach and egg mixture (or just the egg mixture if you are making the basic pasta). 

Step 7- Mix your dough well. At this point, my dough really wasn't coming together well, so I added another egg. Once I worked that in, the dough still wasn't sticking well, so I started adding small bits of water. Knead your dough for about 8-10 minutes until it isn't tacky.  Like I said before, the dough got really tough. I ended up dividing the dough in half to make it a bit more manageable. Cover with plastic wrap and let the dough rest at room temperature from 15 minutes up to 2 hours. I usually go for 30 minutes.

Step 8- Roll your dough and cut your noodles. If you don't have a pasta roller and cutter set, then just use a rolling pin and a knife. It's that simple. My hubby bought me an attachment set for my Kitchen Aid mixer a long time ago, which I hardly used until recently. I love it and it's so much fun to use!!! Either way, I ended up dividing each ball of dough into 3 parts. When you roll the dough out, it spreads A LOT!

If using a pasta roller, I usually run the dough through the first setting 3-4 times. After it passes through, I add a bit of flour if the dough is sticky, then fold it in half, and run it through the first setting again. Then I run it through settings 2-4 one time each. Usually I stop here if making fettucini noodles.

Run the sheets of dough through your pasta cutter. Peanut was intriguied by this!

To keep the cut noodles out of the way while cutting all the dough, I hung them over clothes hangers covered with wax paper. I did take some of the noodles and made small, single serving nests and put those into the freezer for future use. The hanger on the far right I separated out to try air drying those. Once throughly dry (overnight), I broke the noodles in half and put into a Ziploc bag. The freezing and the drying are experiments for me. I usually only make just enough for us to eat. From what I read, freezing is better and it hardly adds any time to the cooking time.

Cooking instructions- Add pasta noodles to a pan of heavily boiling, salted water. Don't skip the salt because it adds more flavor to the noodles, especially since none was added to the dough. From what I've read, the water should taste like the ocean. Boil the pasta for about 3 minutes. That's it!!! It cooks super fast. Serve it up however you like and enjoy!


This is our finished product. The sauce is actually home made tomato sauce I froze from my tomato crop last summer.

The pasta got the Peanut stamp of approval! He likes it because the spinach helps to make his muscles grow big and strong! 

Clean plate (after two giant servings)= successful dinner! 

Give it a shot! Making your own pasta seems like a very daunting task, but if I can do it, anyone can. 


Thursday, March 6, 2014

At Home Spa Night

Last night I decided to give myself a little spa night. Peanut had gone to bed around 7:15pm. The Woodman was getting off work at 8:00pm and then going to the gym, so he wouldn't be home until 10:00pm or so. The dog was already curled up on his bed and snoring like an old man. The night was mine! I could hear our deep bathtub calling my name.

I wanted to do some sort of natural face mask, so off to Pinterest I went to research recipes. I finally found one in which I had all the ingredients at home. I was also on day 5 of not washing my hair and knew it was time to wash it, so I decided to do a coconut oil conditioning treatment beforehand. How can I go so long between hair washings, you ask? I went no 'poo! I also needed to shave my legs, as it is getting a bit warmer outside and I don't need my winter coat anymore.  :)

Coconut Oil Conditioning Treatment

The first thing I did was grab my tub-o-coconut oil. Literally, it's a tub. I got it at Costco earlier in the year and I'm almost at the bottom of it. Thankfully, I got another tub of it this past Christmas as a gift!

All you need to do is grab a handful of coconut oil and start slathering it all over your hair. I take some and rub it in my hands to melt it first. Or, melt a bunch in some hot water beforehand and pour over your hair. Get your hair as greasy as possible and make sure you massage it into your scalp! Then, gently pull it back and cover with a shower cap. A shower cap isn't a necessity, but it does help to hold in warmth from your scalp to help the oil set into your hair. Leave it in your hair for at least 30 minutes. When I know I'm not going to have to go anywhere for awhile, I'll leave it in for 2 hours or more and then I'll apply some extra heat by using my hairdryer to blow hot air onto the shower cap. Some people even go to bed with it and then wash it out the next day. 
Hard to tell, but that hair is super greasy!!! There are still chunks of unmelted oil in there!


When you're finished, you'll need to wash your hair. This is actually the only time I use commercial shampoo, because I've never been able to get just baking soda to wash out all the oil. I usually have to shampoo twice to get all of the oil out. Dry and style as normal. Then I dare you not to rub your hands through your hair! It feels so soft! I try to deep condition my hair about twice a month.

Honey, Nutmeg, and Cinnamon Face Mask

Honey is great for your skin! Refer back to this post if you have forgotten why honey is so awesome. Nutmeg helps to reduce blemishes, is a great exfoliant, and works wonders at removing blackheads. Cinnamon is actually an antiseptic, which means it'll help reduce bacteria. It also helps to pull oxygen, blood, and other nutrients to the surface of your face, which will make your skin glow! 

This mask is super easy to whip up and it smells great too! Get a small bowl and mix together:
          2Tbsp. Honey
          1 tsp. cinnamon
          1 tsp. nutmeg

Combine until a thick paste forms. Put a small daub of it on the inside of your wrist and let it sit for a few minutes to see if you have any sort of reaction to the ingredients. I've read that some sensitive skin types might have a problem with the cinnamon. Once you've tested the mask, spread on your face and let it sit anywhere from 30 minutes up to an hour. Now, I found this mask a bit drippy, so I suggest doing this while soaking in a tub. If not, make sure you have a towel handy to wipe up any drips. When you're ready to remove the mask, use a rag and rub VERY GENTLY in circular motions to exfoliate your face. After I rinsed off the mask, my skin felt so much tighter. I also didn't even need to use any coconut oil as a moisturizer afterwards! Plus, I smelled like a cinnamon Christmas ornament! 
Wow....this mask really brings out the brown in my eyes! :)

Oil Pulling

This is something else I did during my spa night. Now, I'm not going to write too much about oil pulling....yet. I'm going to do this regularly for two weeks and then write a blog post about oil pulling. I came across oil pulling when I first got into using coconut oil. It was on some list of things you could do with coconut oil. Having never heard of it before, I looked it up. I've tried it a few times here and there and have been impressed with the results, but I think it's something you need to do on a regular basis for it to really be beneficial. Google it and see what you find. 

Anywho, I put all the coconut oil in my hair for the deep conditioning treatment. I then applied the face mask. I got a Tbsp. of coconut oil and started with my oil pulling and then got into the tub to soak and read. My first timer went off at 20 minutes, which is when I finished with the oil pulling. I made sure I had a disposable cup nearby to spit the oil into, and I also had my toothbrush nearby to brush afterwards. Then at the 30 minute mark, I washed off the face mask. I then took the tub-o-coconut oil, got a chunk out of it, slathered it on my legs, and shaved. It makes great shaving cream! Plus, no need to moisturize afterwards! When I finished all that, I got into the shower to wash the coconut oil out of my hair. 

The results of my at home spa night were, as follows:
  • I was more relaxed
  • I finished up a book
  • my hair was softer
  • my skin was tighter and well moisturized
  • my legs were super smooth and soft
All in all, a success!